Last week I released my first ever FREE two-page template here at NettioDesigns. Since then I’ve gotten some questions about the best way to crop the template into a 12×12 page so I’ve whipped up a little tutorial with some tips to show you just how easy it is to do.
If you haven’t already, you can download your own copy of the template here.
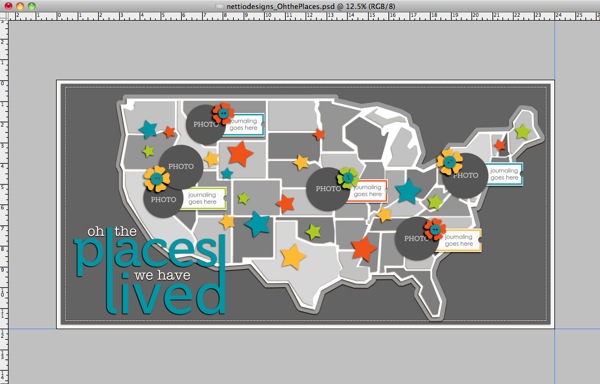
Step 1: Open the template in your scrapbooking program of choice (for me that is Photoshop CS3). The template is 12×24 inches so it’s really two 12×12 pages side-by-side in a single document.
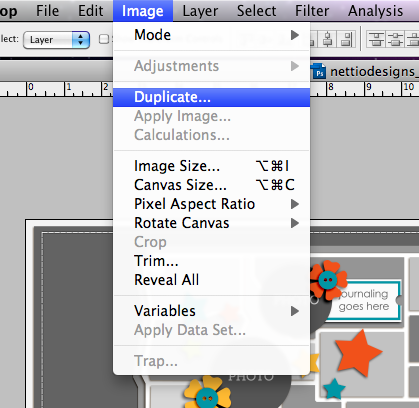
Step 2: Save a duplicate copy of the template so you don’t accidentally crop your original copy.
To do this, you can either go to File>Save As to save the existing document with the new name or you can go to Image>Duplicate to create a copy and then Save the duplicate copy. I recommend using Image>Duplicate so that you can have both the new cropped version and the original template open in Photoshop at the same time.
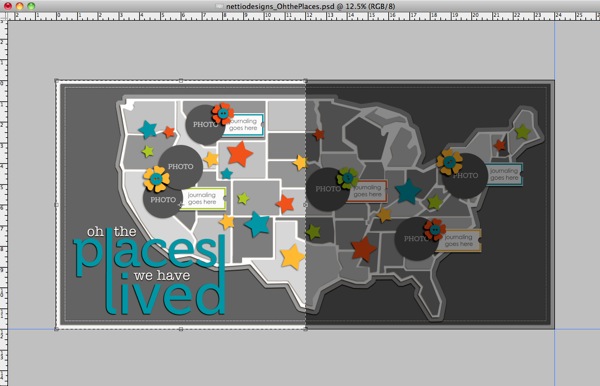
Step 3: Grab your Crop tool ![]() and starting in the top left or right corner (top left corner for the West Coast, top right corner for the East Coast), hold down the Shift key and drag a box out towards the center of the template. Holding down the Shift key is key because it will guarantee you get a perfect square crop.
and starting in the top left or right corner (top left corner for the West Coast, top right corner for the East Coast), hold down the Shift key and drag a box out towards the center of the template. Holding down the Shift key is key because it will guarantee you get a perfect square crop.
Your crop box would now look like this for the West Coast:
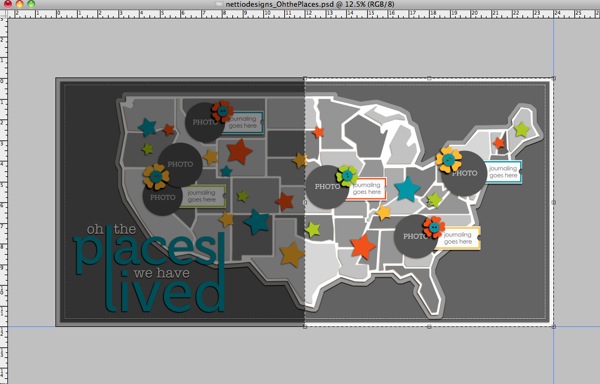
This for the East Coast:
Or you can even go with something like this for the Mid West:
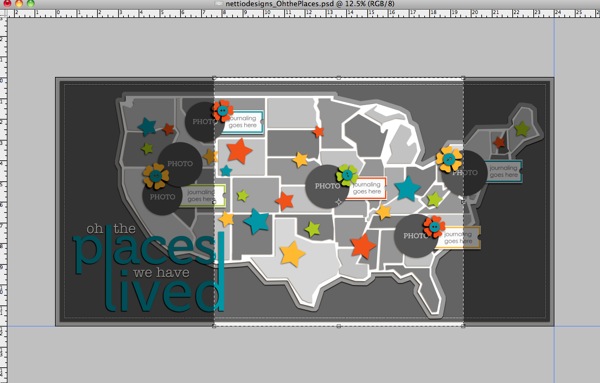
Once you’ve drawn out your crop box, check to make sure any elements or states you want to include are within the highlighted crop box.
If they’re not, cancel the crop and move those elements into the area you plan to crop so they won’t get lost when you crop the template. You can also transform the map to a smaller size to include more states or move the states closer to the left side of the page if you want to include more of the Western half of the US.
Step 4: Once you’re happy with the area within your crop box, press Enter to crop the template.
Your template should now look something like this:
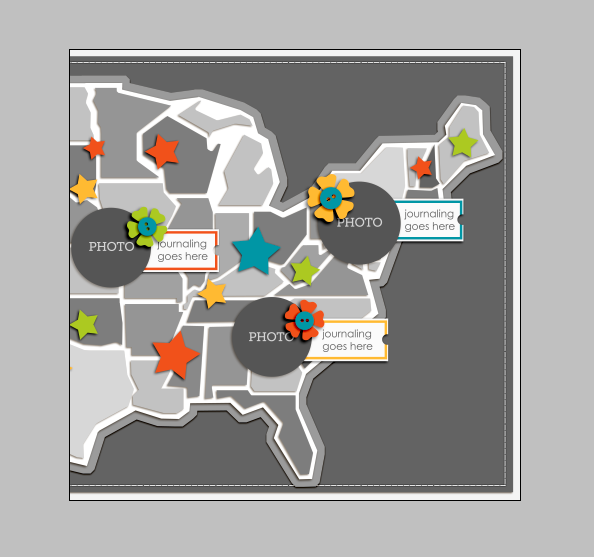
Step 5: Now add your own papers, photos and elements to the template like you normally would to create your page!
If you’d like to use the entire two page template, create your page first and then follow these same directions to crop each left and right page to 12×12 so you can upload them to be printed later on.
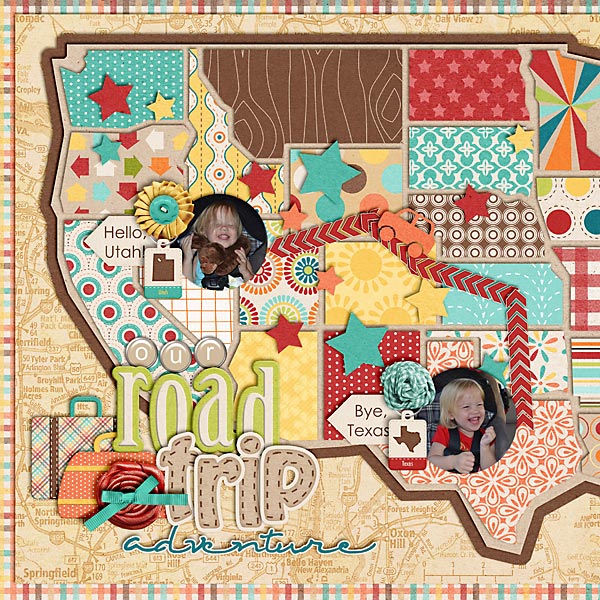
And in case you’re in need of some layout inspiration, check out this super cute Road Trip page from NettioDesigns CT Member Natalie. She moved the map portion of the template closer to the left hand side of the page to get more of the Western US and then cropped her page to 12×12. I just love the little car zipping between the states!
Hope this helps and if you have any questions, just let me know!
I came accross your blog and I must say…THANK you!!!! I was looking for a tutorial like this!!
I have tried a few things, but it never worked out for me, I will use this tut the next time
I will create a 2 pager 🙂 And thank you so much for that amazing template and tut as well, will try
to make one from my own country when things will slow down 🙂
Thanks again!!!
Oh, you’re very welcome! So glad you found it helpful! 🙂