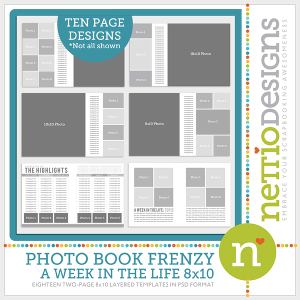
 Since releasing the Photo Book Frenzy: A Week In the Life templates last week, I’ve received some questions about how exactly they work and how you can use them to put together your own photo book.
So in an effort to offer some clarity, I’ve put together a two-part video tutorial showing you just how easy it is to use these templates to create your own photo book.
I’ve been wanting to create some video tutorials for quite some time but I’ll admit, the thought of having to listen to my own voice on a recording kind of scared me – what if I sounded crazy?! – but it turned out to be really fun!
But before we get to the videos, I wanted to answer a couple of the questions I’ve been frequently asked about these templates:
1) What size are the actual templates?
The Photo Book Frenzy: AWITL 8×10 templates are 10 inches tall by 16 inches wide. This represents two 8×10 pages side-by-side in a single spread, just like you see when you look at any book. The Photo Book Frenzy: AWITL 12×12 templates are 12 inches high by 24 inches wide – two 12×12 pages side by side.
This makes it easy to give your two pages a cohesive look but you will need to crop each template into two individual pages for printing which I show you how to do in Part 2 of the video.
2) Is your A Week In the Life album cover design included with the templates?
As of right now, no. My concern with including a template based on the cover of my album was that unlike with the individual pages, the sizing of an image-wrapped cover depends on a lot of different variables – type of paper, thickness of book, number of pages, etc., and because of the grid-based design of the cover and the spine text, it’s not quite as easy to adjust as the pages.
But I may do some more research into this and if I can figure an easy way to include it, I’ll be sure to send an update to anyone who has purchased the templates.
UPDATE 5/01/12: Happy Day! Both the Photo Book Frenzy templates have been updated to include cover templates for creating a front and back cover for your book.
3) Can these templates be resized for say 8×8, 10×10 or 6×12?
Yes. In the case of a square-size like 8×8 or 10×10, your best bet is to pick up the Photo Book Frenzy: AWITL 12×12 templates and size them down as the proportions will remain the same. Resizing for 6×12 is a little more complicated as you’d have to adjust the photos and journaling individually but it can be done with a little effort.
In Part 2 of the video tutorial, I’ll show you how to adjust the template to fit the specifications of your photo book printer as well.
Ok, now onto the videos!
In Part 1 of the tutorial, I show you how to resize the template to fit the exact size of your photo book and how to design your page using the template and clipping masks. In Part 2 of the tutorial, I show you how to crop your pages for printing and then upload them to Blurb using Blurb’s online Bookify tool.
Part 1: Resize & Design Your Book
How To Create A Blurb Photo Book Using Digital Scrapbooking Templates: Part 1 from Lynnette Penacho on Vimeo.
You can find the Blurb full-bleed sizing info here.
Part 2: Crop & Upload Your Book
How To Create A Blurb Photo Book Using Digital Scrapbooking Templates: Part 2 from Lynnette Penacho on Vimeo.
I hope you find the videos helpful and as always, if you have any questions or anything, feel free to ask away in the comments section!